How & Where to Find WPS Pin on HP Printer
You may have heard about WPS pins, but did you know that you can use them to create a wireless connection between HP printer and router? WPS pins are unique 8-digit numbers generated by HP printers that are meant to make wireless connections between HP printer and router. To get the WPS pin on HP printer, read the steps below. If you have trouble with your WPS pin, contact HP technical support or your local computer store.
Location of WPS pin on HP printer
The Wi-Fi Protected Setup (WPS) pin is used to secure your HP printer’s wireless connection. Your printer generates the WPS pin every time it connects to your wireless network. You can find it on the bottom or back of your router. To connect to your printer wirelessly, you need to enter the WPS pin into your router. Using the WPS pin, you can connect your HP printer to your wireless network.
Using the WPS pin to connect an HP printer is easy, but you need to know where to find it. Most HP printers have a screen on top that displays the WPS pin. However, if your HP printer does not have a screen, you can use a push button on the printer. This will display a screen displaying the WPS pin. If you cannot find the WPS pin on your HP printer, you can use the smart app to locate it.
Unique 8-digit number generated by HP printer
If you’re wondering how to connect your HP printer to your wireless router, you need to use a unique 8-digit number, or WPS Pin. WPS pins are secret codes between HP printers and wireless routers, and can help keep your HP printer safe from unauthorized access and anonymous users. This technology has become very popular with printer owners, and it is easy to see why. Here’s how it works.
A WPS pin is an 8-digit number generated by HP printers. When you connect to a network, this password will be encrypted and can’t be changed. You’ll be prompted to enter this password on your HP printer’s screen for between eight and 10 seconds. If you miss it, try entering it again. Then, your printer will be able to connect wirelessly. Once connected, you can print from anywhere in the world.
Steps to enter WPS pin on HP printer
When you want to connect your HP printer to the wireless network, you’ll have to enter the WPS PIN to connect to the network. In order to connect to the wireless network, your printer must be encrypted with the WPA or WPA2 personal security protocols, and you’ll need to enter the WPS PIN to complete the process. Fortunately, HP has made it easy to set up WPS connections. Simply find the “Wi-Fi Protected Setup” button on the control panel of your printer and follow the on-screen instructions to complete the process.
Turn on your HP printer and restart if necessary. Next, tap on the WPS icon on the printer’s control panel to reveal the WPS PIN. On most models, the WPS pin will show for about 90 seconds. If it’s not displayed after the 90-second period, try restarting the printer and your router. This will reset the printer’s network settings. This step is very simple, but be sure to follow the directions exactly or you’ll end up with a printer that doesn’t connect to the network.
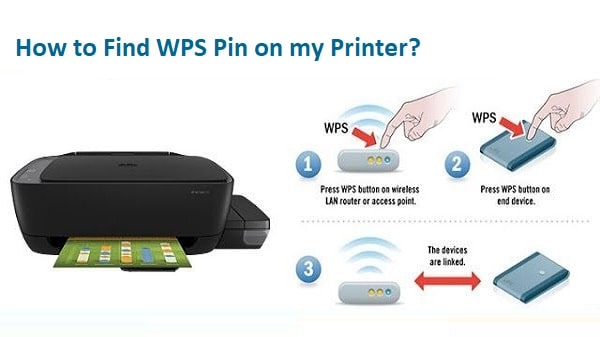
Wireless connection between HP printer and router with WPS pin
Using a WPS pin will allow you to create a wireless connection between your HP printer and your router. WPS provides a high level of security for your network connections. WPS pins are generated for each new wireless device that connects to the router. WPS pins can be entered into the printer’s LED screen to allow you to create a secure connection. Once you have entered the pin, you can use the printer as usual or create a new one.
To find your WPS pin, go to your HP printer’s Control Panel and find the Wireless button. From there, you can select “Settings” and then “Wi-Fi Protected Setup.” You will be asked to enter your WPS PIN. You can also view it on the HP printer’s screen by following the on-screen instructions. Once you have entered the WPS PIN, you can open the software or configuration utility of your wireless router.